Choosing the Right Microphone for Home Recording: A Comprehensive Guide
Introduction
In the realm of home recording, the microphone you choose can make a significant difference in the quality of your recordings. Whether you’re a budding musician, podcaster, voice-over artist, or content creator, selecting the right microphone is crucial. This comprehensive guide will help you navigate the vast world of microphones, understand the various types and their applications, and make an informed decision that best suits your recording needs.
Chapter 1: Understanding Microphone Basics
Before diving into specific types of microphones, it's essential to understand some basic concepts that apply to all mics. These include transducer types, polar patterns, frequency response, and sensitivity.
1.1 Transducer Types
Microphones convert sound waves into electrical signals using transducers. There are three main types:
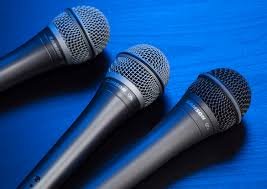
Dynamic Microphones: These are rugged and versatile, making them great for live performances and home studios. They are less sensitive to high frequencies and quiet sounds, making them ideal for recording loud sound sources like drums and guitar amps.
Condenser Microphones: Known for their sensitivity and accuracy, condenser mics are popular for studio recordings. They capture a wide frequency range and are excellent for vocals, acoustic instruments, and detailed recordings. However, they are more fragile and often require phantom power.
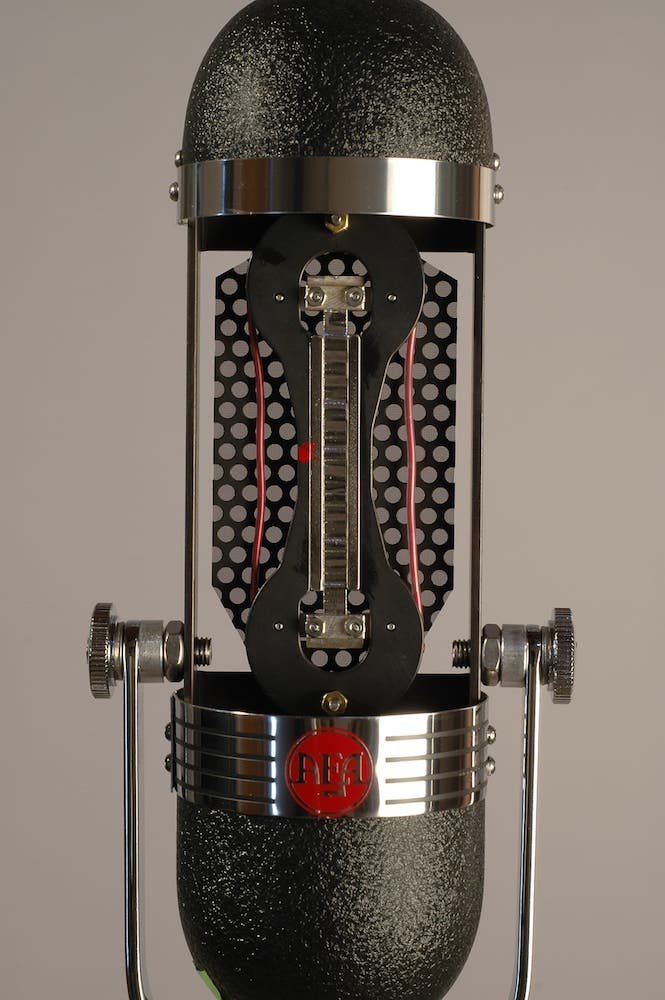
Ribbon Microphones: These vintage-style mics are prized for their warm and natural sound. They are delicate and typically used in controlled studio environments. Ribbon mics are great for capturing the nuances of vocals and acoustic instruments.
1.2 Polar Patterns
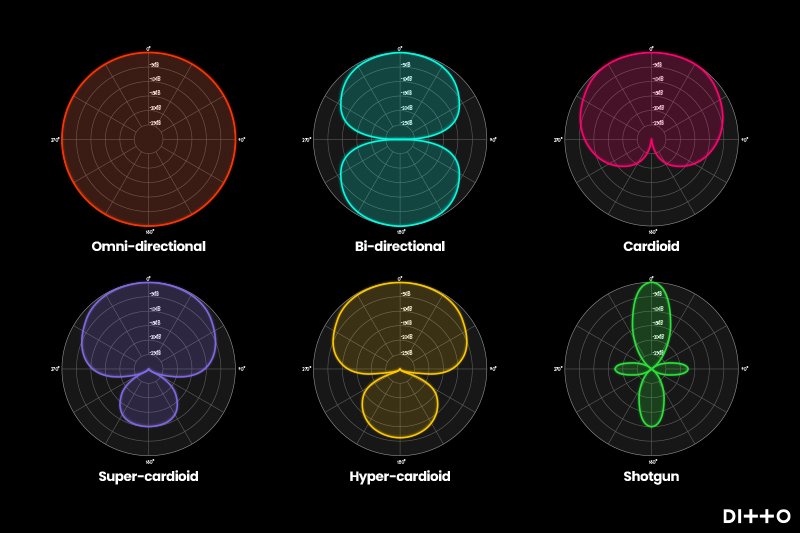
The polar pattern of a microphone describes how it picks up sound from different directions. Common polar patterns include:
Cardioid: This unidirectional pattern picks up sound primarily from the front, making it ideal for isolating the sound source and reducing background noise.
Supercardioid and Hypercardioid: These patterns are similar to cardioid but with a tighter focus on the front and some pickup from the rear. They are useful in noisy environments where greater isolation is needed.
Omnidirectional: This pattern captures sound equally from all directions, making it suitable for capturing ambient sounds and group recordings.
Figure-8: Also known as bidirectional, this pattern picks up sound from the front and rear while rejecting sound from the sides. It’s often used in stereo recording techniques and for capturing two sound sources simultaneously.
1.3 Frequency Response and Sensitivity
Frequency Response: This refers to the range of frequencies a microphone can accurately capture. A flat frequency response is ideal for a natural sound, while tailored frequency responses can enhance specific sound sources.
Sensitivity: This measures how efficiently a microphone converts sound into an electrical signal. Higher sensitivity mics capture quieter sounds but may also pick up more background noise.
Chapter 2: Types of Microphones and Their Applications
2.1 Dynamic Microphones
Dynamic microphones are durable and versatile, making them a staple in both live and studio settings. Popular models include the Shure SM58 and the Sennheiser e835. These mics are perfect for:
Vocals: Their ruggedness and ability to handle high sound pressure levels make them great for vocal performances.
Instruments: Ideal for recording drums, guitar amps, and other loud instruments.
2.2 Condenser Microphones
Condenser microphones are known for their sensitivity and clarity. Popular models include the Audio-Technica AT2020 and the Rode NT1-A. They are ideal for:
Vocals: Providing a clear, detailed sound that captures every nuance of the performance.
Acoustic Instruments: Perfect for recording guitars, pianos, and strings.
Voice-Overs and Podcasts: Their clarity makes them a favorite among content creators.
2.3 Ribbon Microphones
Ribbon microphones are cherished for their warm and natural sound. Classic models include the Royer R-121 and the AEA R84. These mics are best suited for:
Vocals: Offering a vintage, smooth sound that flatters many vocal styles.
Strings and Brass: Capturing the rich, full tones of these instruments.
Room Ambience: Great for adding depth and warmth to a recording.
2.4 USB Microphones
USB microphones are convenient and user-friendly, connecting directly to a computer without the need for an audio interface. Popular models include the Blue Yeti and the Audio-Technica AT2020USB+. These mics are ideal for:
Podcasts and Streaming: Easy setup and good sound quality make them perfect for online content.
Voice-Overs: Convenient for recording narration and dialogue.
Home Studio Beginners: A cost-effective and straightforward solution for those new to recording.
Chapter 3: Choosing the Right Microphone for Your Needs
3.1 Recording Vocals
For recording vocals, a condenser microphone is generally the best choice due to its sensitivity and wide frequency response. If you’re recording in an untreated room, consider a cardioid pattern to minimize background noise. Some recommended models include:
Budget: Audio-Technica AT2020
Mid-Range: Rode NT1-A
High-End: Neumann U87
3.2 Recording Instruments
The type of instrument you’re recording will influence your microphone choice:
Acoustic Guitar: A small-diaphragm condenser mic like the Shure SM81 provides a detailed and balanced sound.
Electric Guitar: A dynamic mic like the Shure SM57 is a classic choice for miking guitar amps.
Drums: A combination of dynamic mics for the kick and snare (e.g., AKG D112 for kick, Shure SM57 for snare) and condenser mics for overheads (e.g., Rode NT5) is a common setup.
3.3 Podcasting and Voice-Overs
For podcasting and voice-overs, clarity and ease of use are key. USB microphones are convenient, but if you want higher quality, consider an XLR condenser mic with an audio interface. Some top choices include:
USB: Blue Yeti, Audio-Technica AT2020USB+
XLR: Rode NT1-A, Shure SM7B
3.4 Field Recording
For capturing sounds in the field, portability and durability are important. Consider using a handheld recorder with built-in microphones or a small diaphragm condenser mic with a portable audio interface. The Zoom H5 and Tascam DR-40X are popular choices.
Chapter 4: Setting Up Your Microphone for Optimal Performance
4.1 Proper Placement
Microphone placement can drastically affect the quality of your recordings. Here are some tips:
Vocals: Place the mic about 6-12 inches from the singer, using a pop filter to reduce plosives.
Acoustic Guitar: Position the mic around the 12th fret, angled towards the soundhole, about 6-12 inches away.
Drums: Experiment with different placements to capture the best sound from each drum and cymbal.
4.2 Room Acoustics
Treating your recording space can significantly improve your recordings. Use acoustic panels, bass traps, and diffusers to reduce unwanted reflections and standing waves. For vocals, consider using a reflection filter behind the mic to further isolate the sound.
4.3 Using Pop Filters and Shock Mounts
Pop filters reduce plosive sounds caused by hard consonants like "p" and "b". Shock mounts isolate the microphone from vibrations and handling noise, ensuring a cleaner recording.
4.4 Phantom Power
Condenser microphones require phantom power to operate. Most audio interfaces and mixers provide 48V phantom power, but ensure your device is compatible before connecting.
Chapter 5: Troubleshooting Common Microphone Issues
5.1 No Sound
Check all connections and ensure your audio interface or mixer is receiving power.
Verify that phantom power is enabled for condenser microphones.
Ensure the correct input is selected in your DAW or recording software.
5.2 Low Volume
Increase the gain on your audio interface or mixer.
Ensure the microphone is positioned correctly and the sound source is at an appropriate distance.
5.3 Background Noise
Treat your recording space to minimize reflections and external noise.
Use a noise gate or post-processing to reduce unwanted sounds.
5.4 Distortion
Lower the gain to prevent clipping and distortion.
Use a pad switch on the microphone if available, especially for loud sound sources.
Conclusion
Choosing the right microphone for home recording involves understanding the different types of microphones and their specific applications. By considering your recording needs, the type of sound source, and your budget, you can make an informed decision that will enhance the quality of your recordings. Remember, the right microphone is an investment in your craft, so take the time to choose wisely. Happy recording!


